Inhalt
Perform the macOS Update
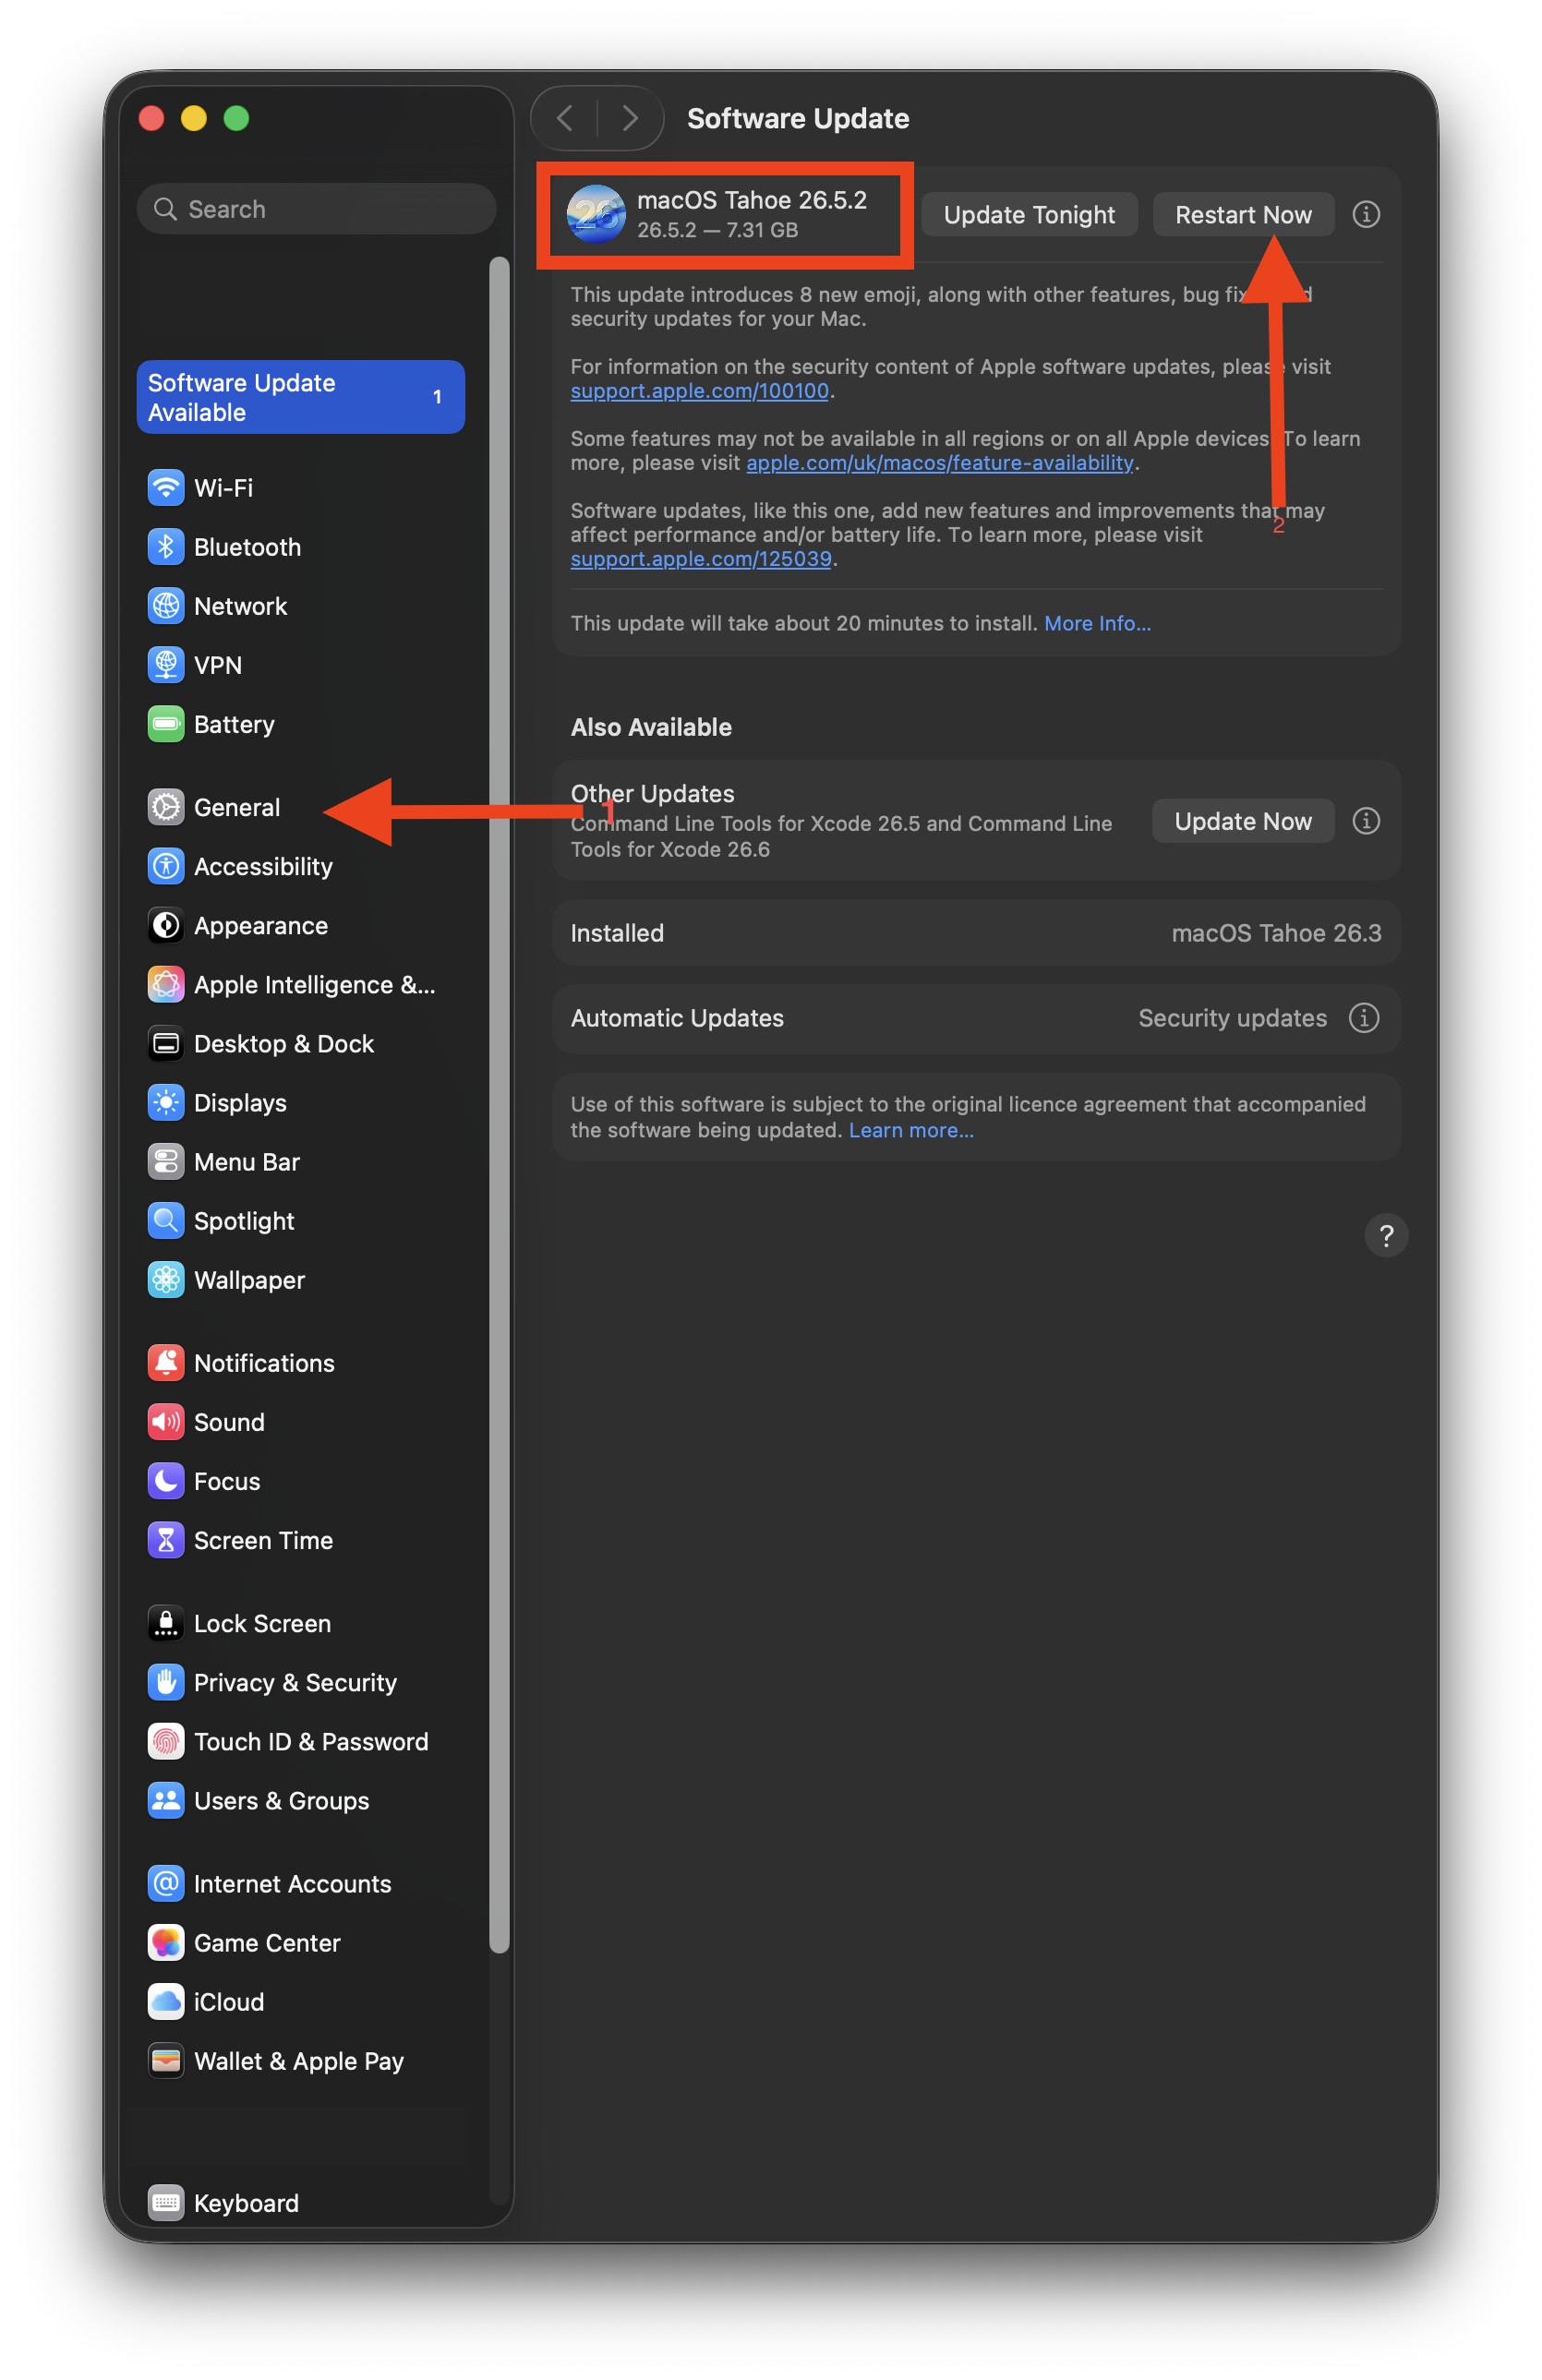
- Open System Settings: Click the Apple menu () in the top-left corner of your screen and select System Settings.
- Find the Software Update: Click General then Software Update. (Note for older macOS versions: In the main System Preferences window, click Software Update directly).
- Start the Update: When the update appears, click Update Now (for minor updates), Upgrade Now (for major macOS version upgrades), or Restart Now if the update has already been downloaded.
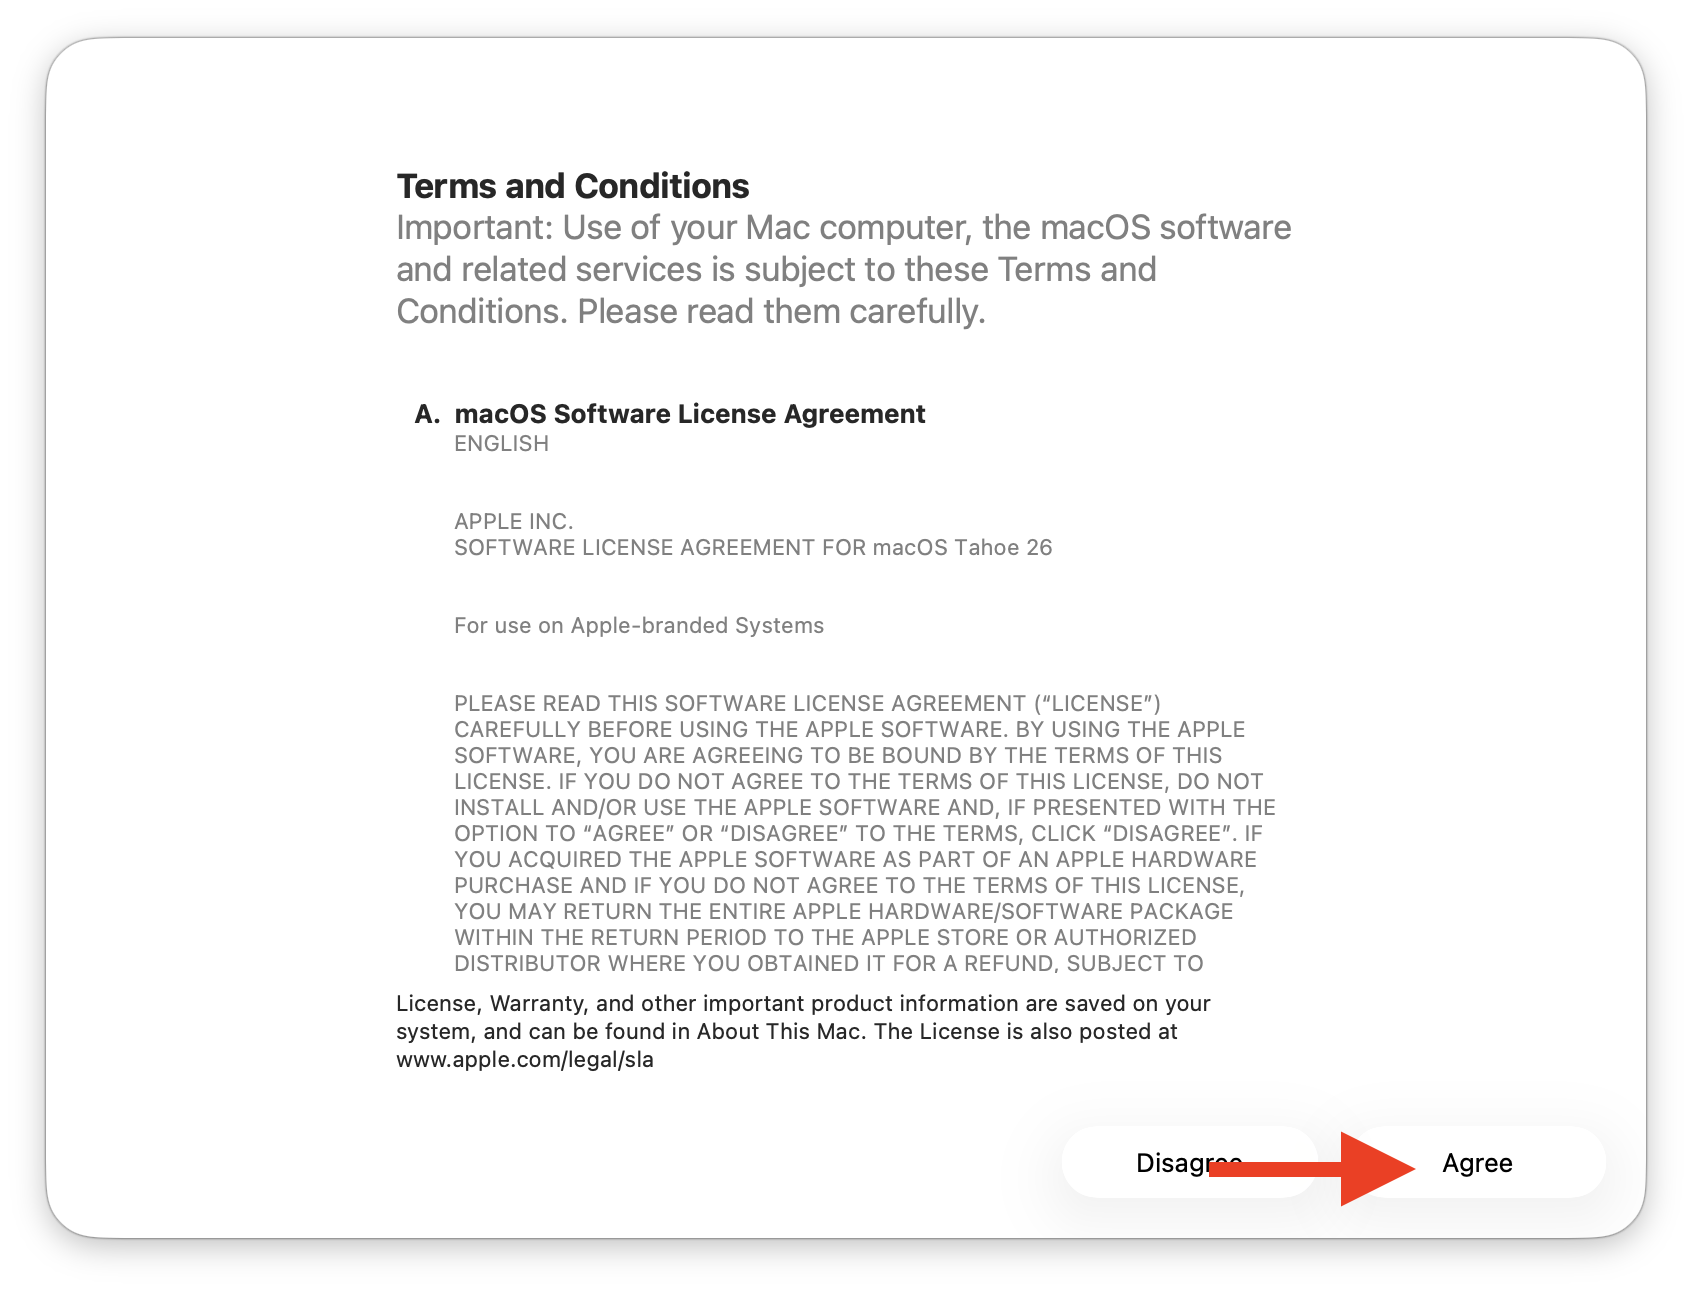
- Install the Update: Accept the license agreement and confirm that you want to begin the installation. Your Mac will download the update, install it automatically, and restart several times during the process. It might ask you for your User Password.
Once the Update is complete, follow the instructions below for the settings that need to be selected the first time you log in after Update.
1. Initial Setup:
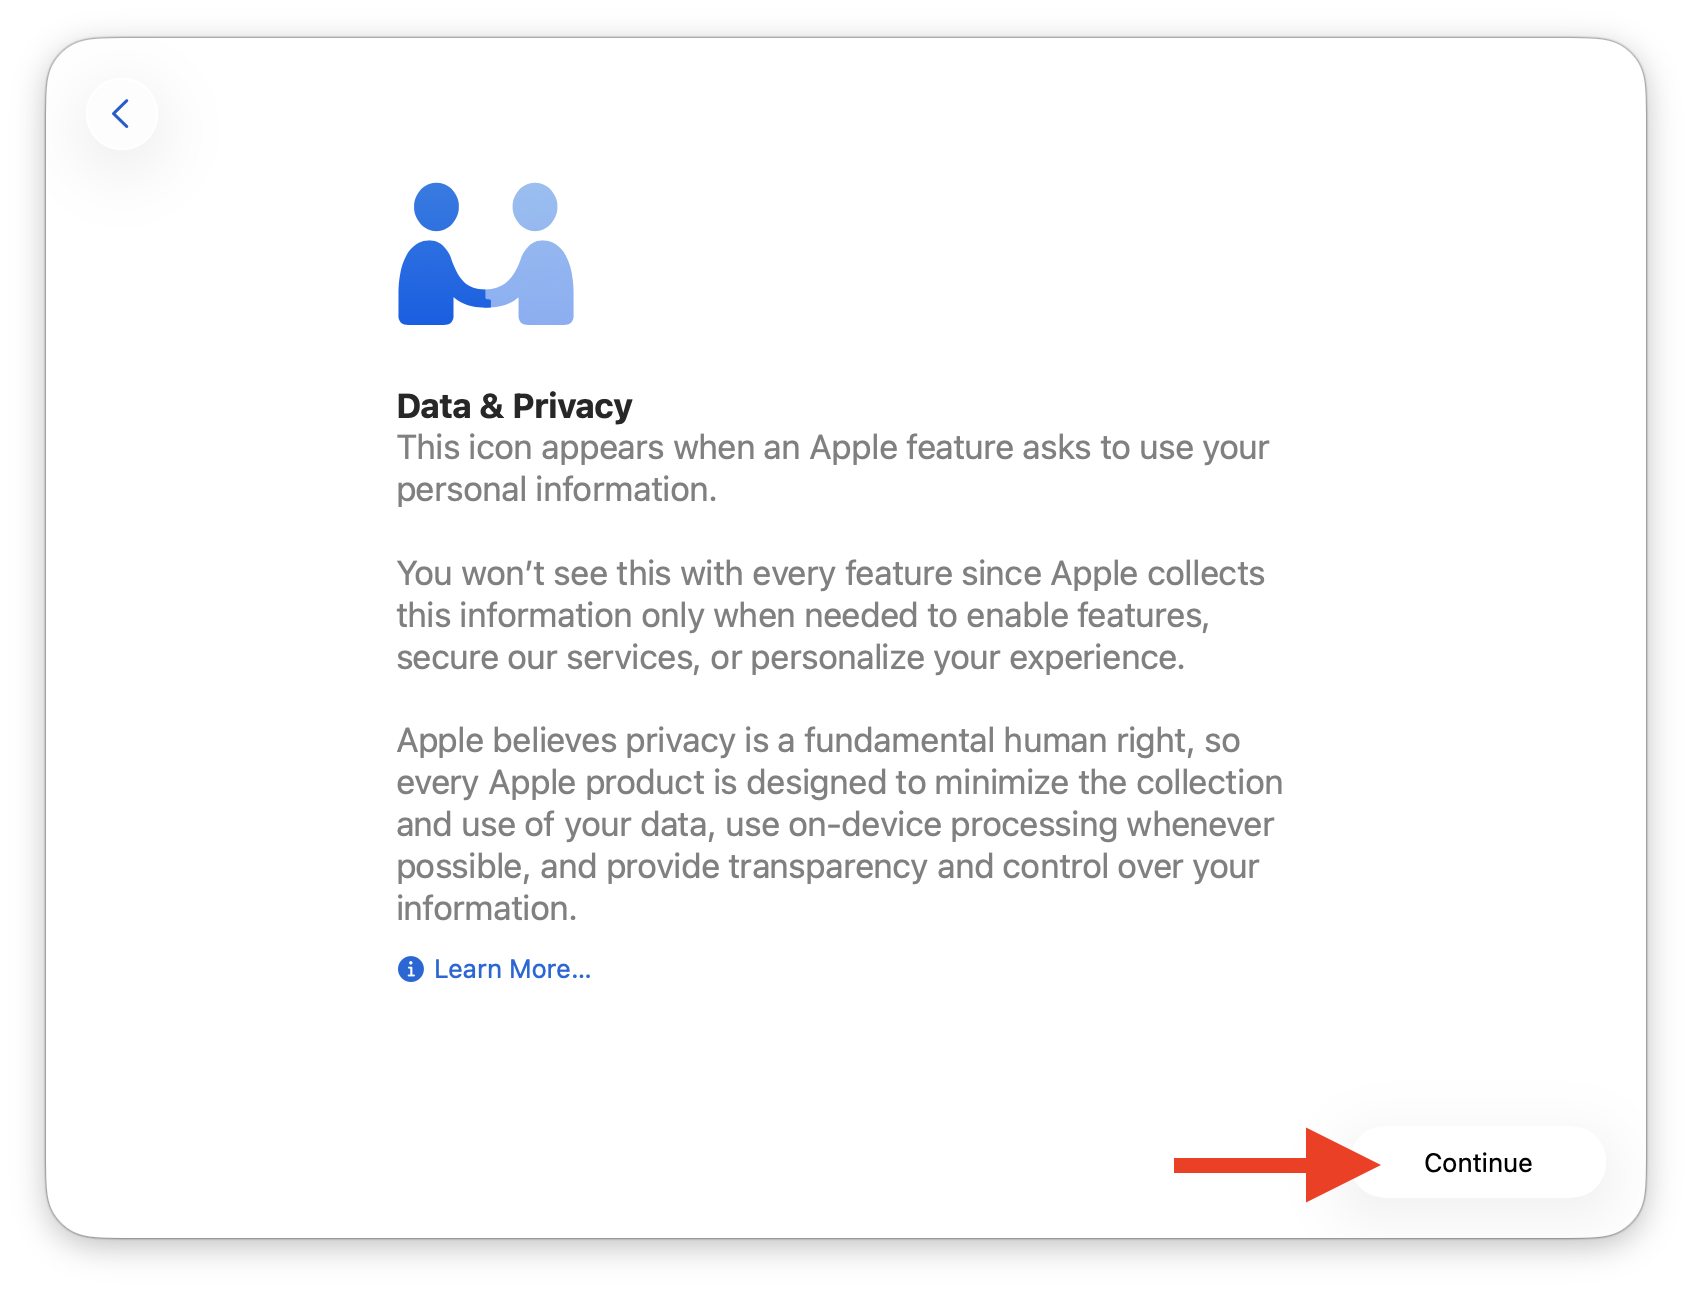
When you log in to your personal user account for the first time, you wlll be greeted by several setup screens. These settings can always be changed later in the system settings. Whenever available, click Set Up Later/Skip/Not Now for all applicable options. Otherwise, click Continue. Below is a list of all the possible setup dialogs (depending on your macOS version, not all of them may appear):
- If none of these setup screens appear, you can skip this step and continue with Step 2.
 1 1 | 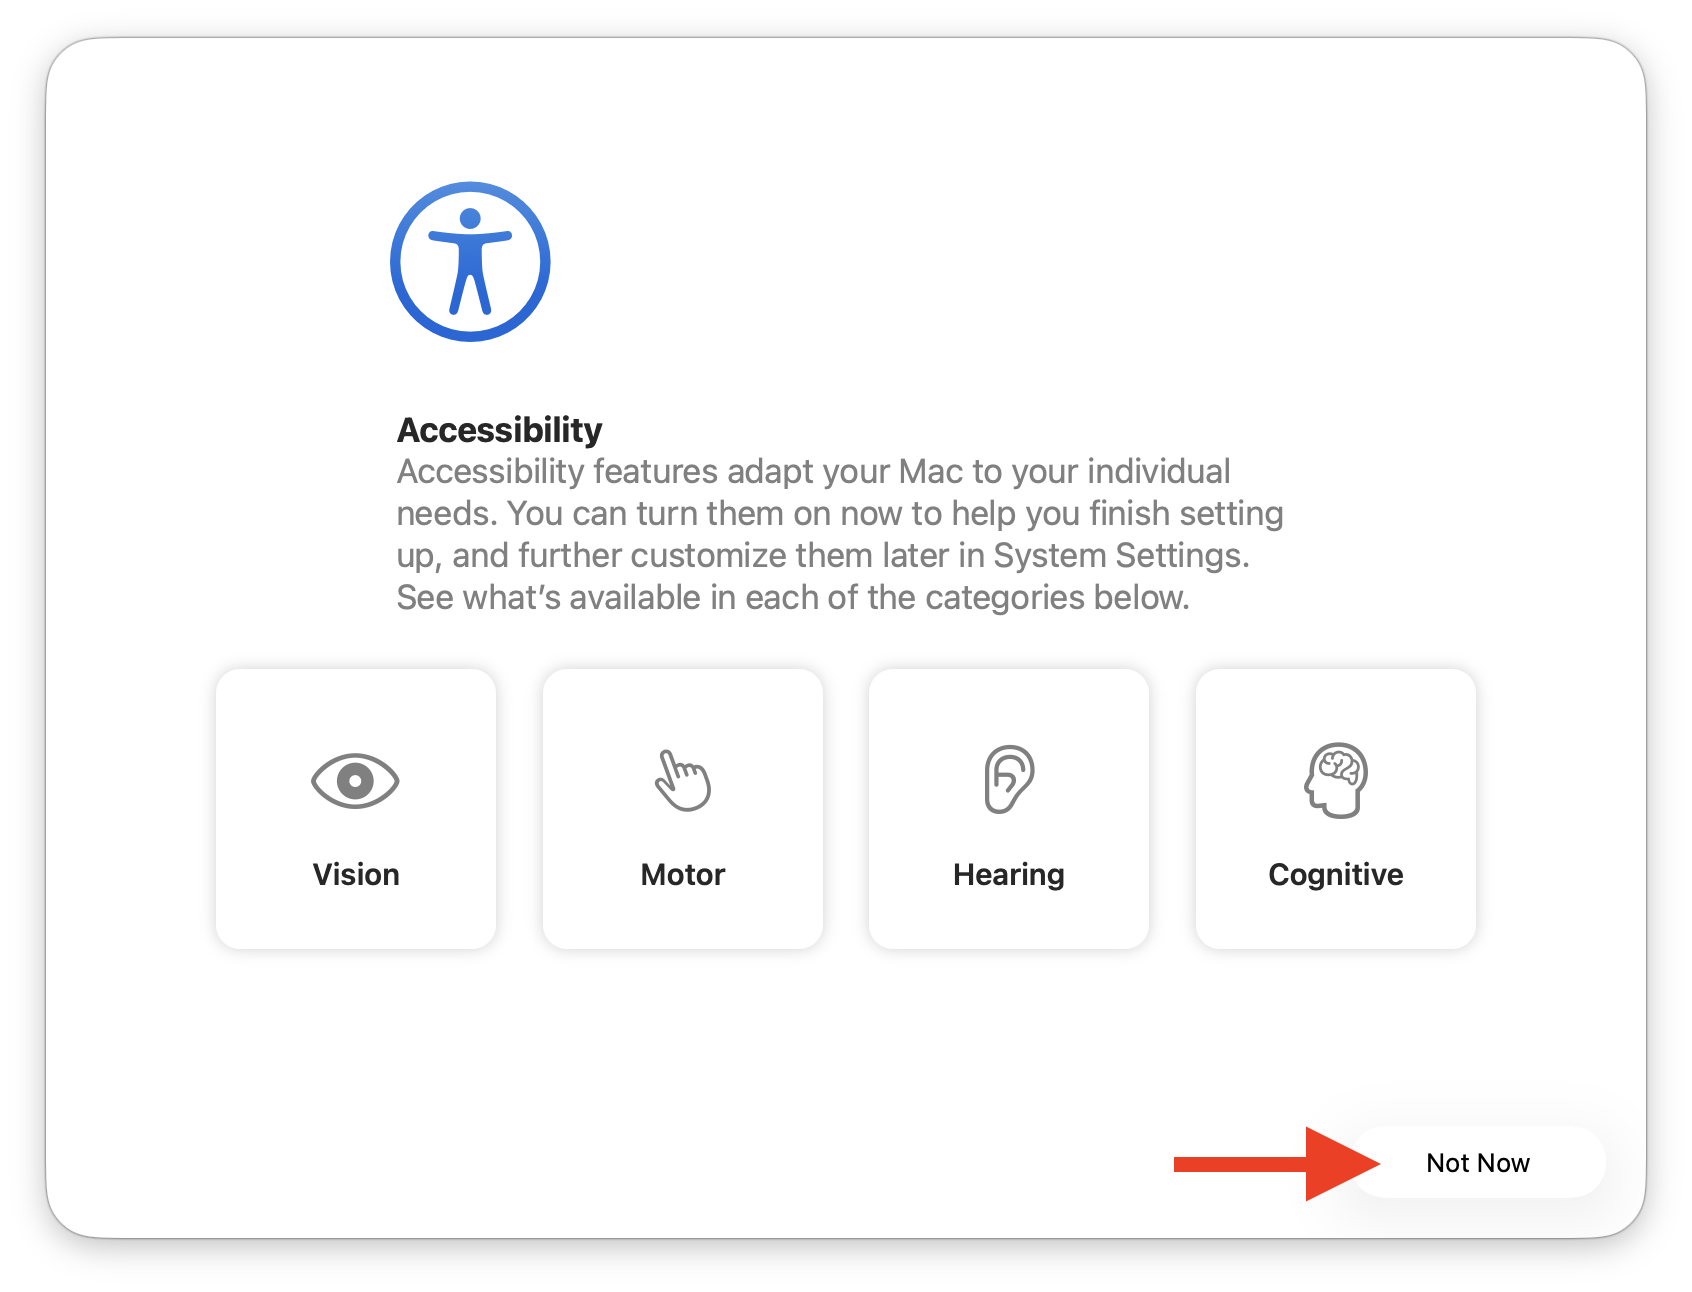 2 2 |
 3 3 | 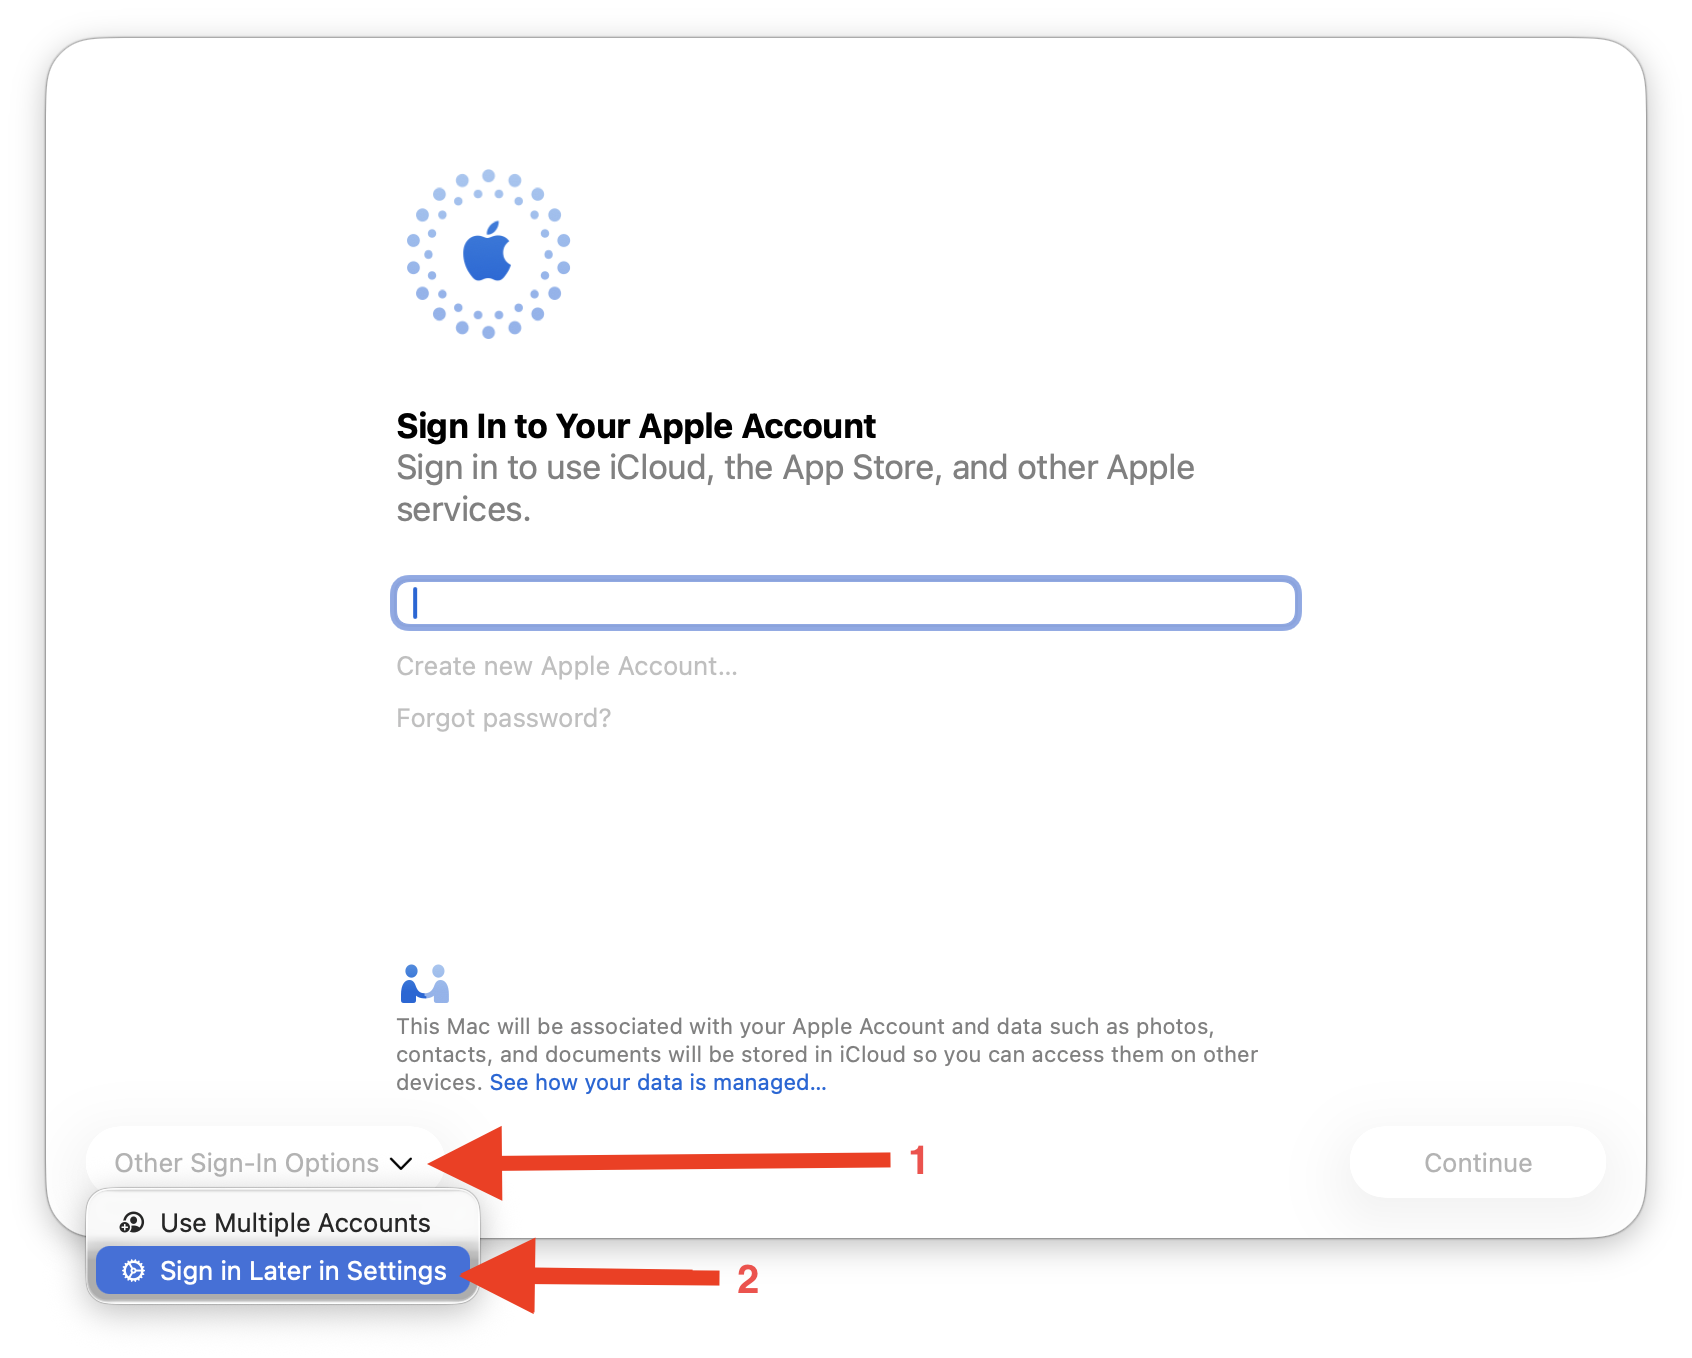 4 4 |
5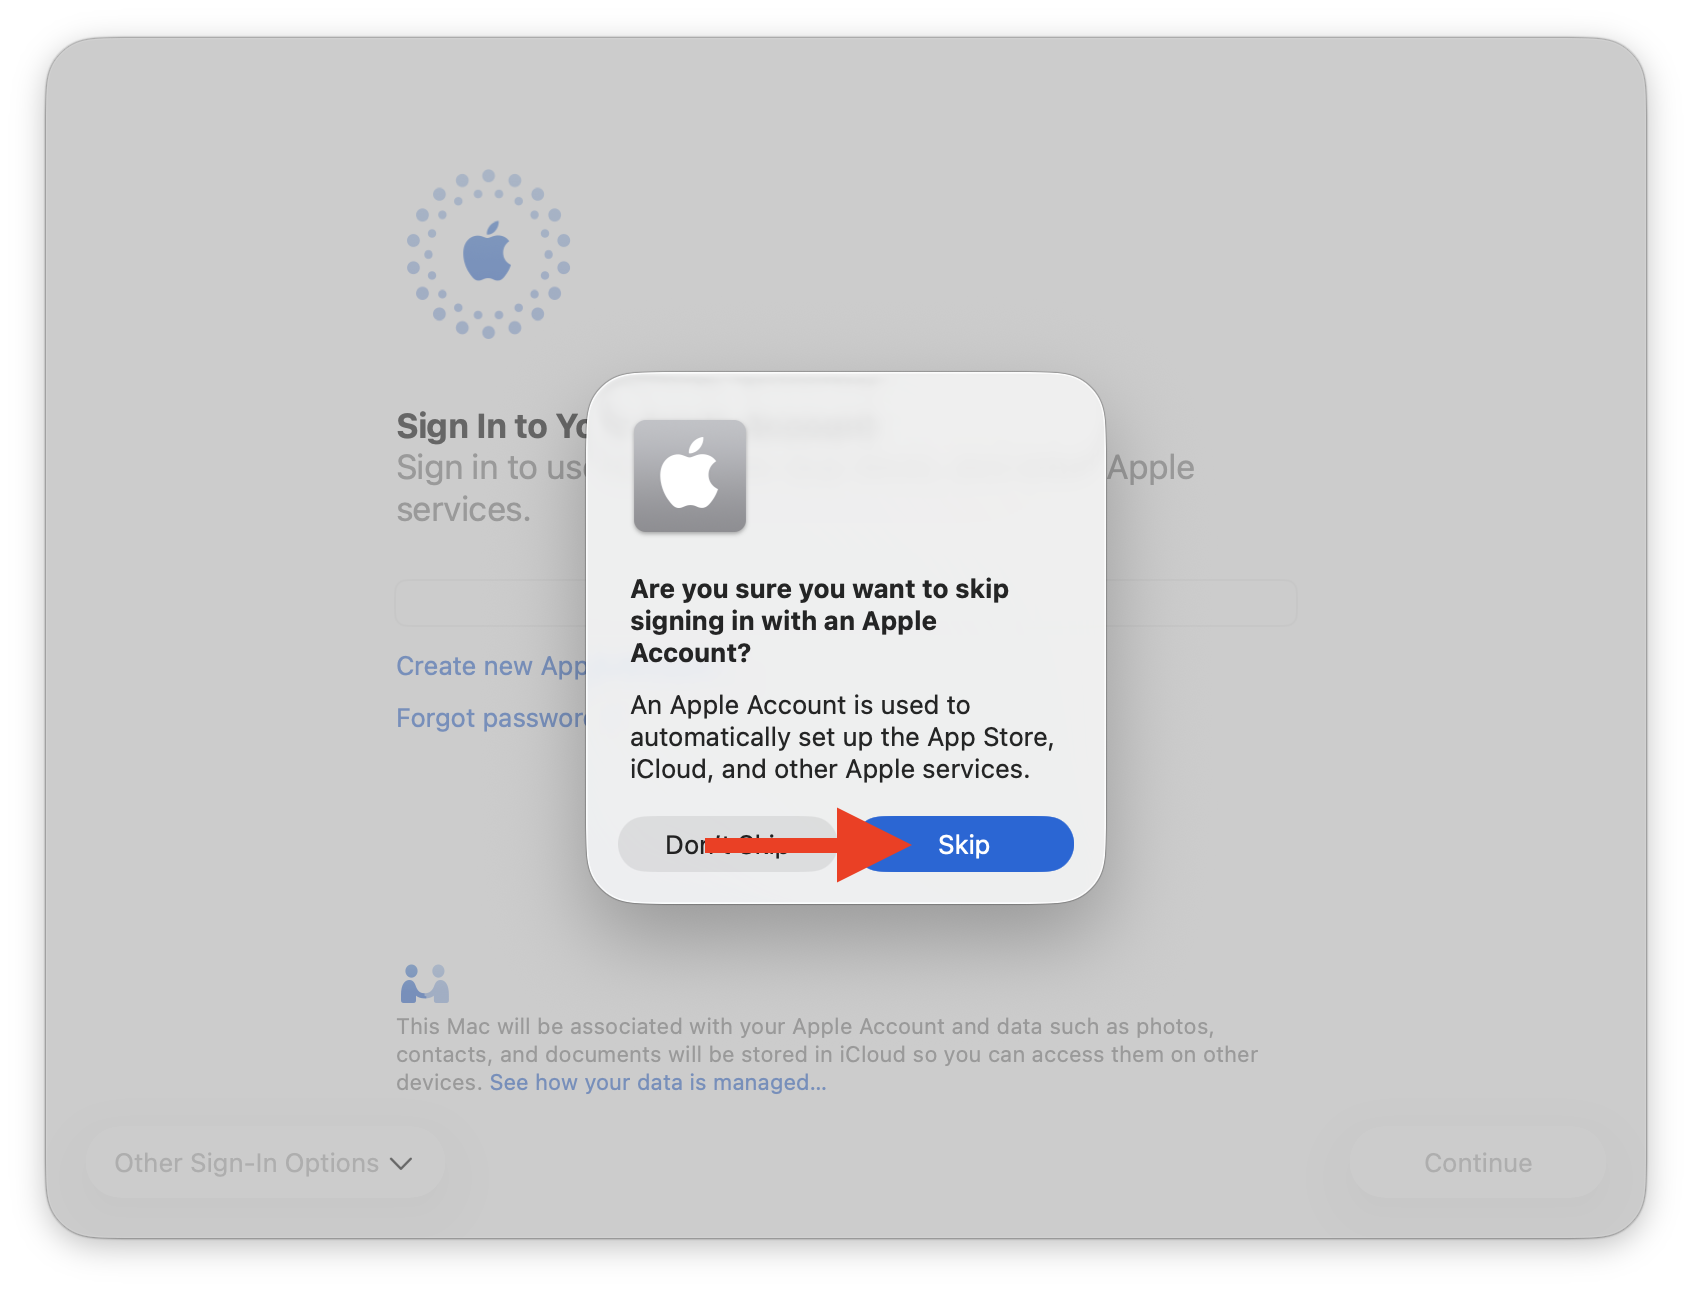 | 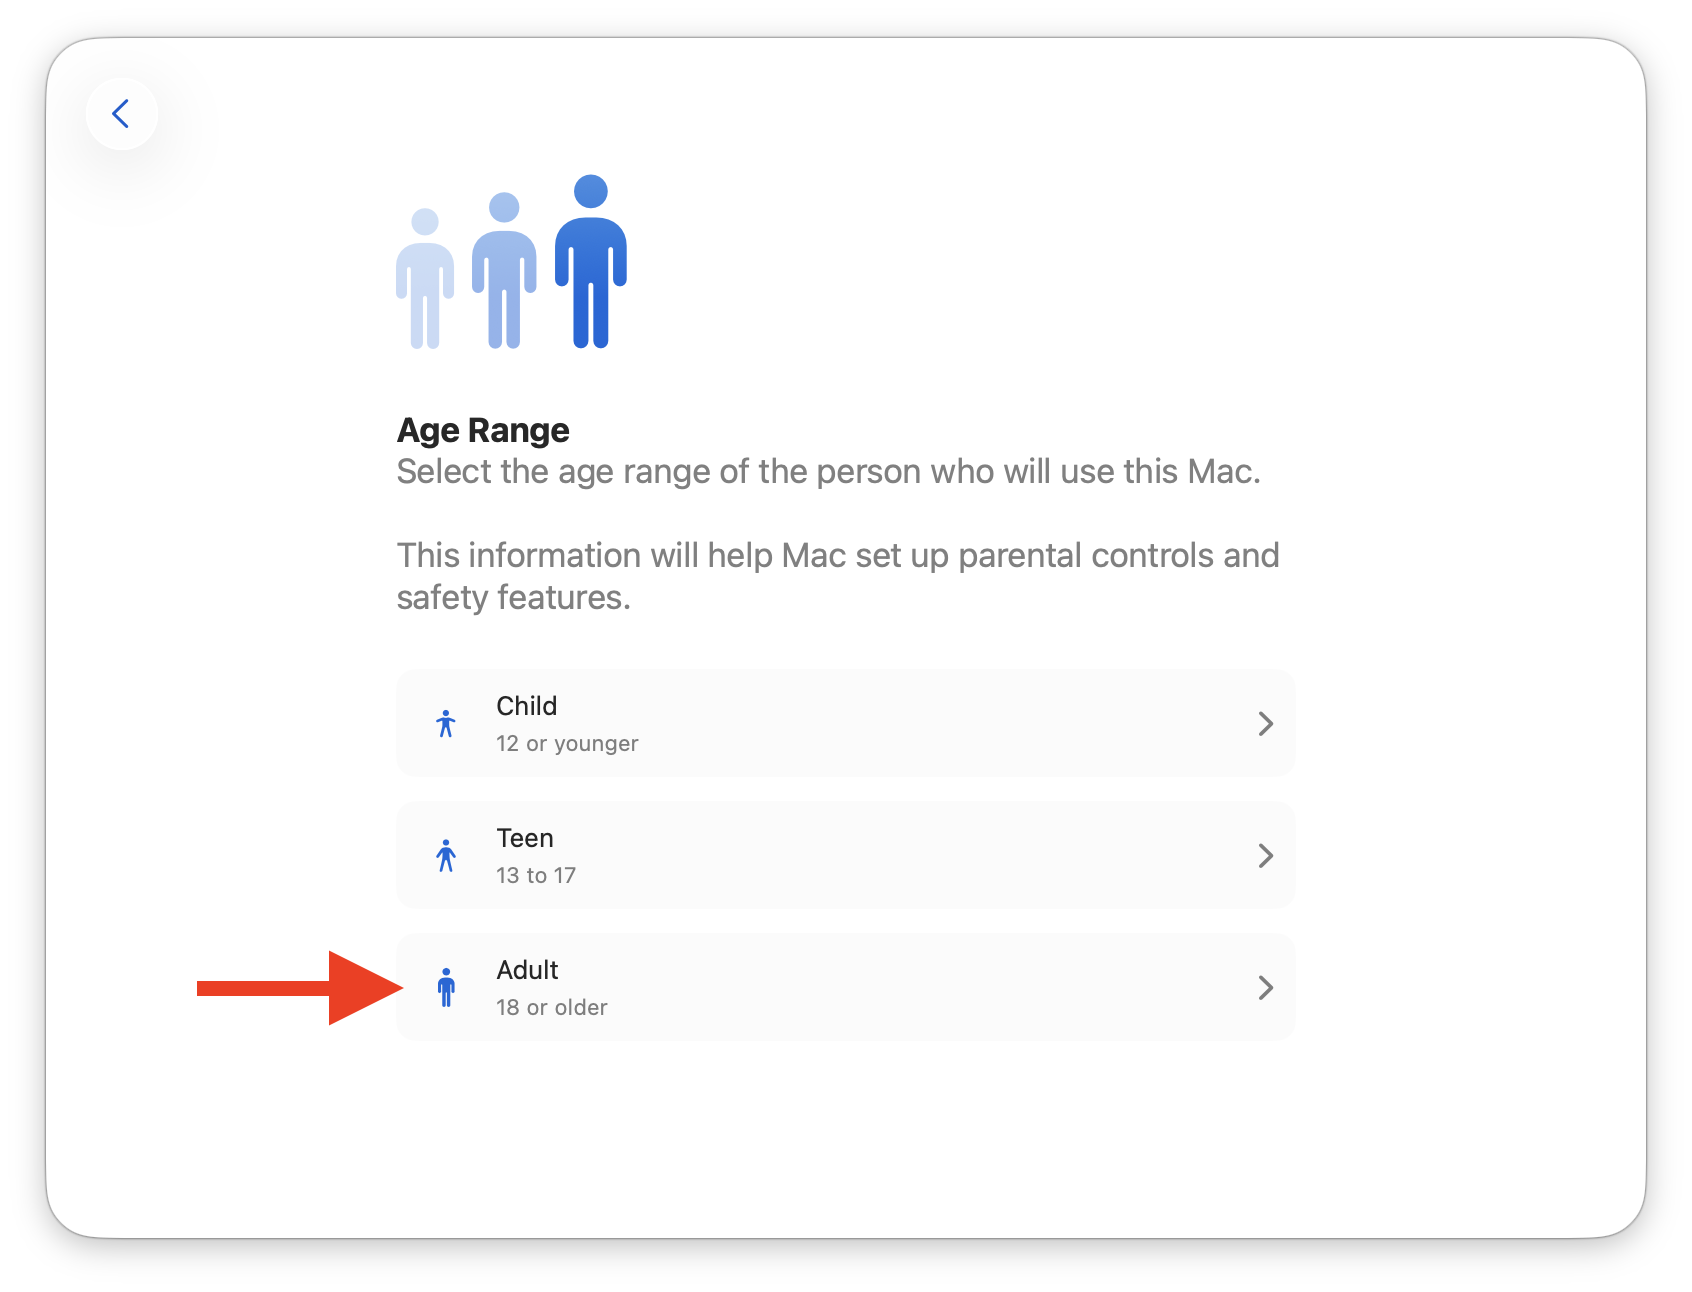 6 6 |
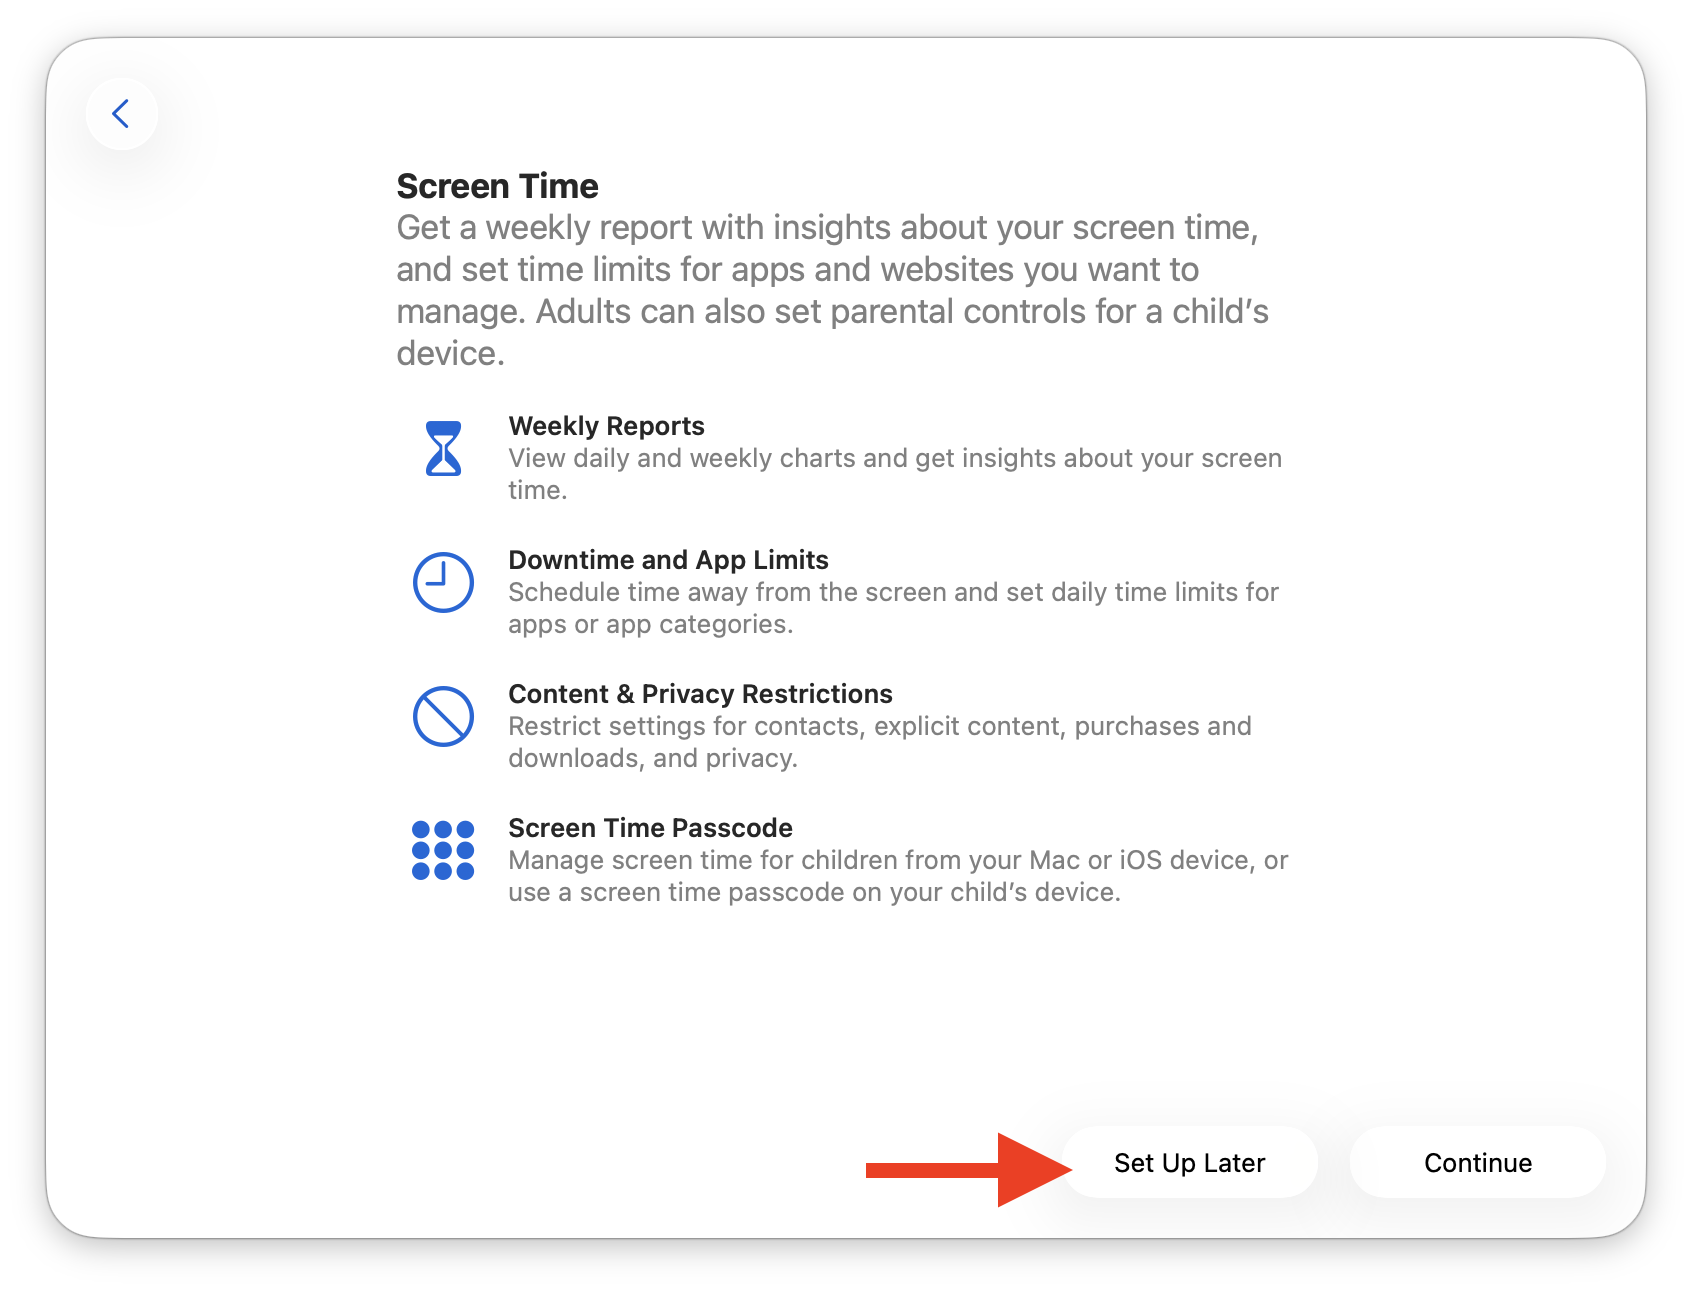 7 7 | 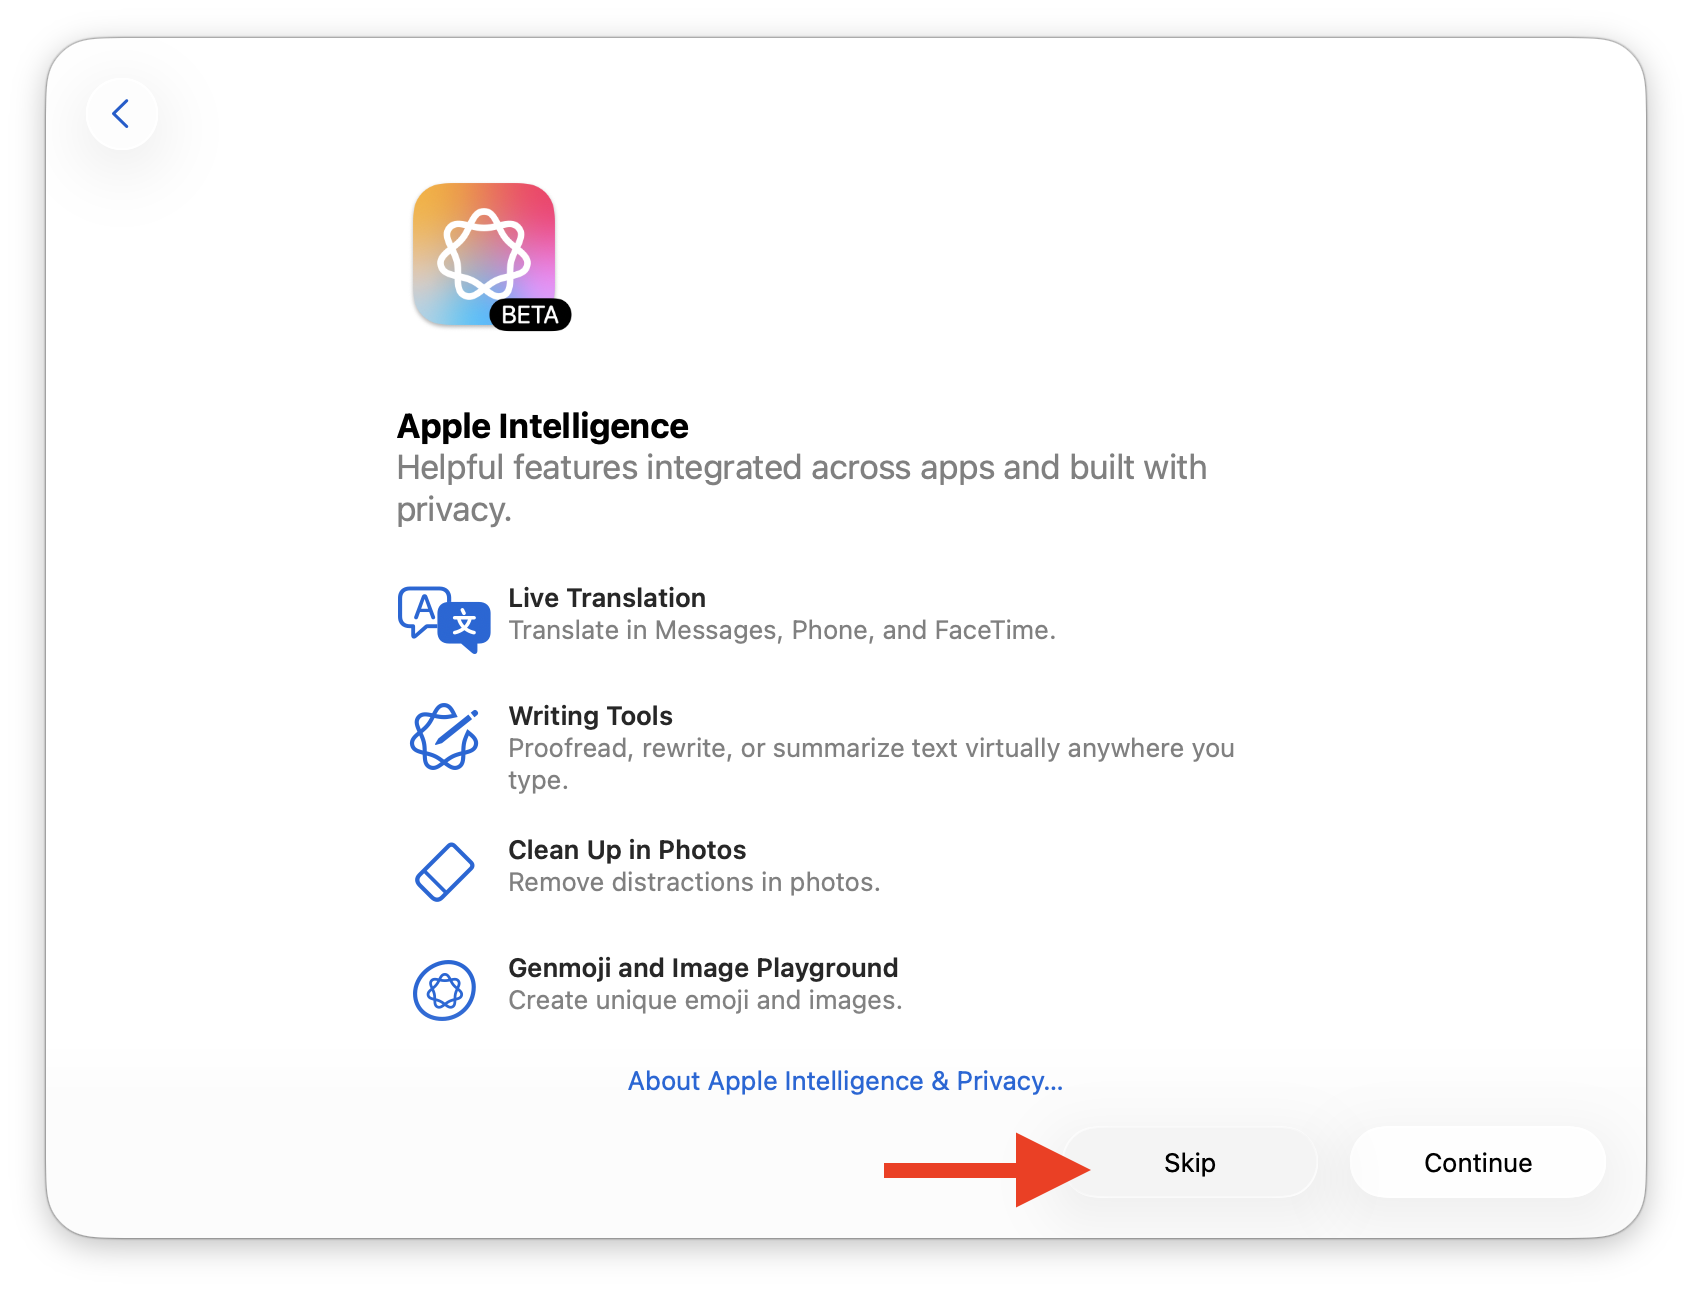 8 8 |
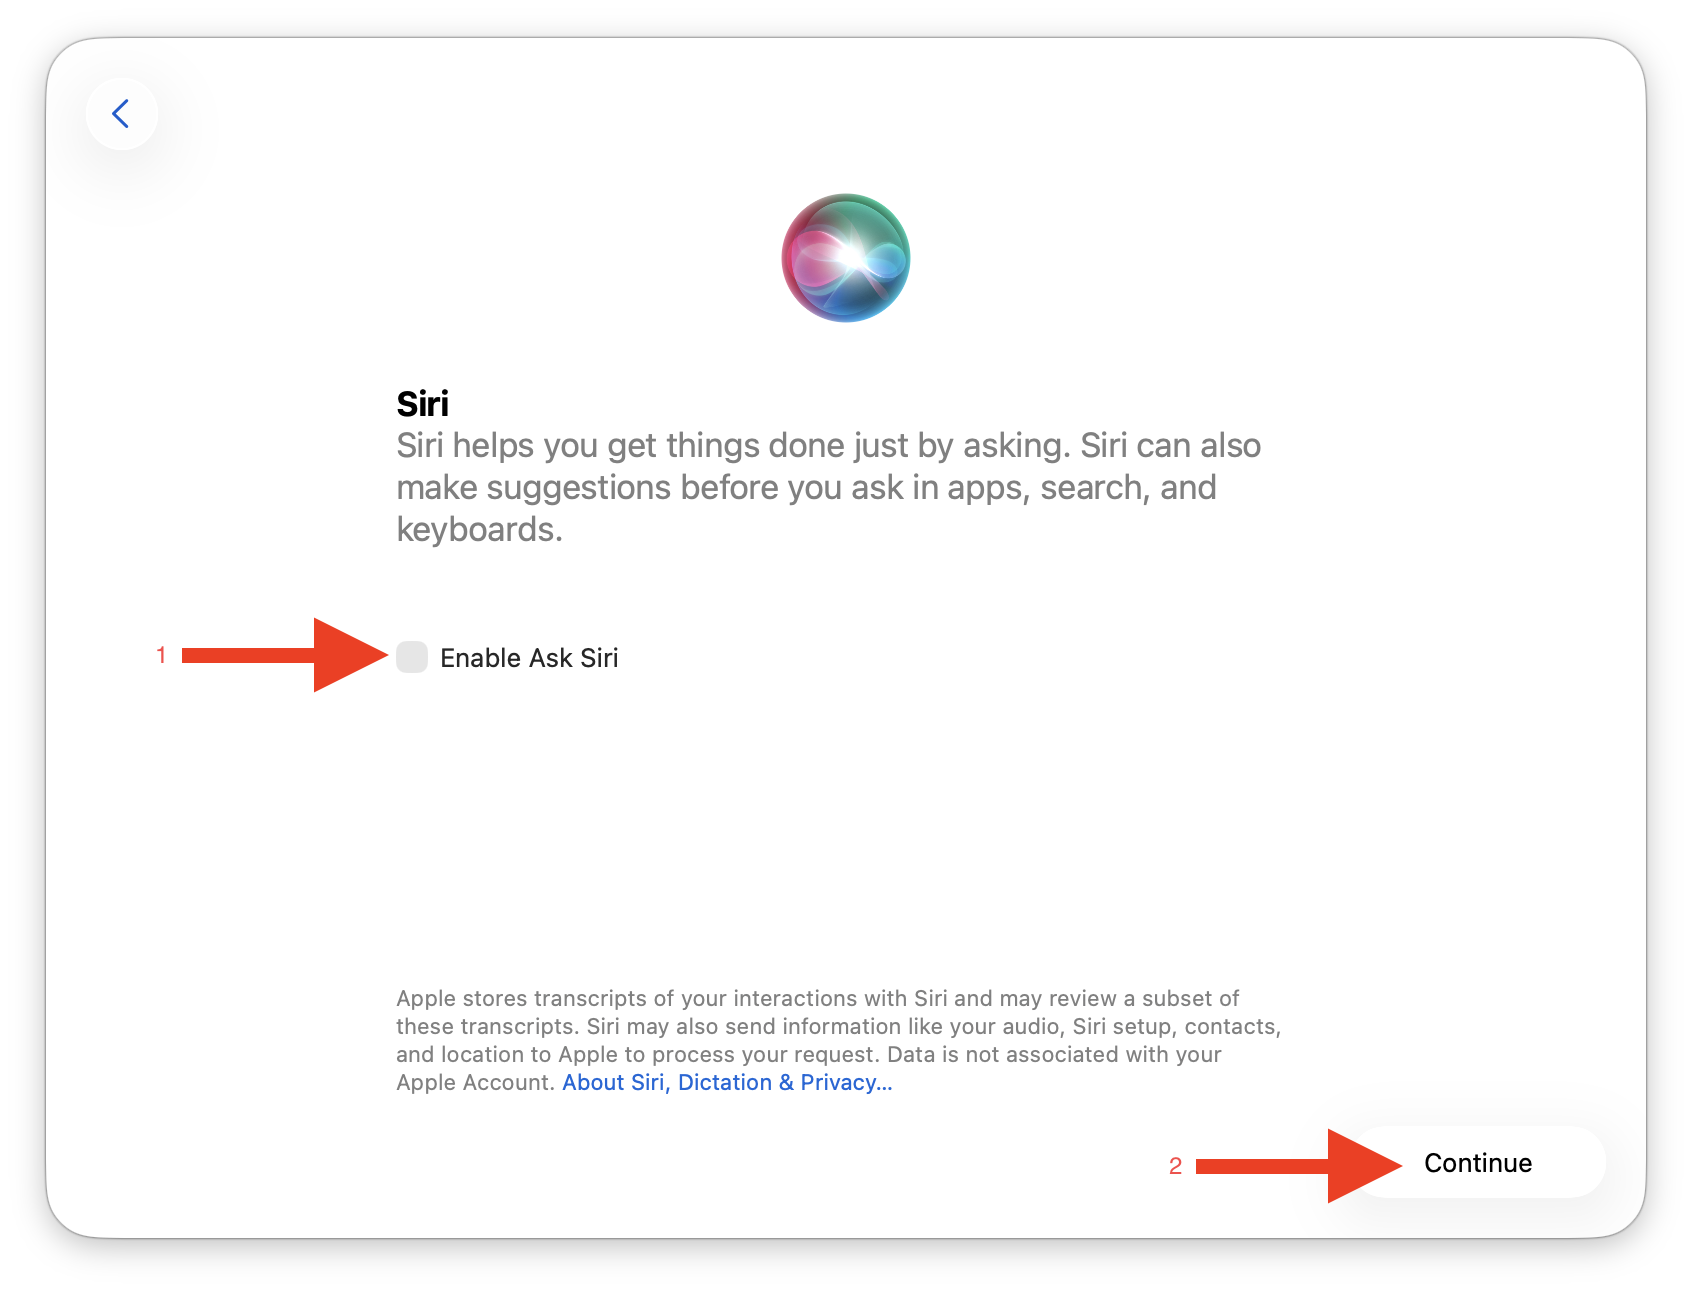 9 9 | 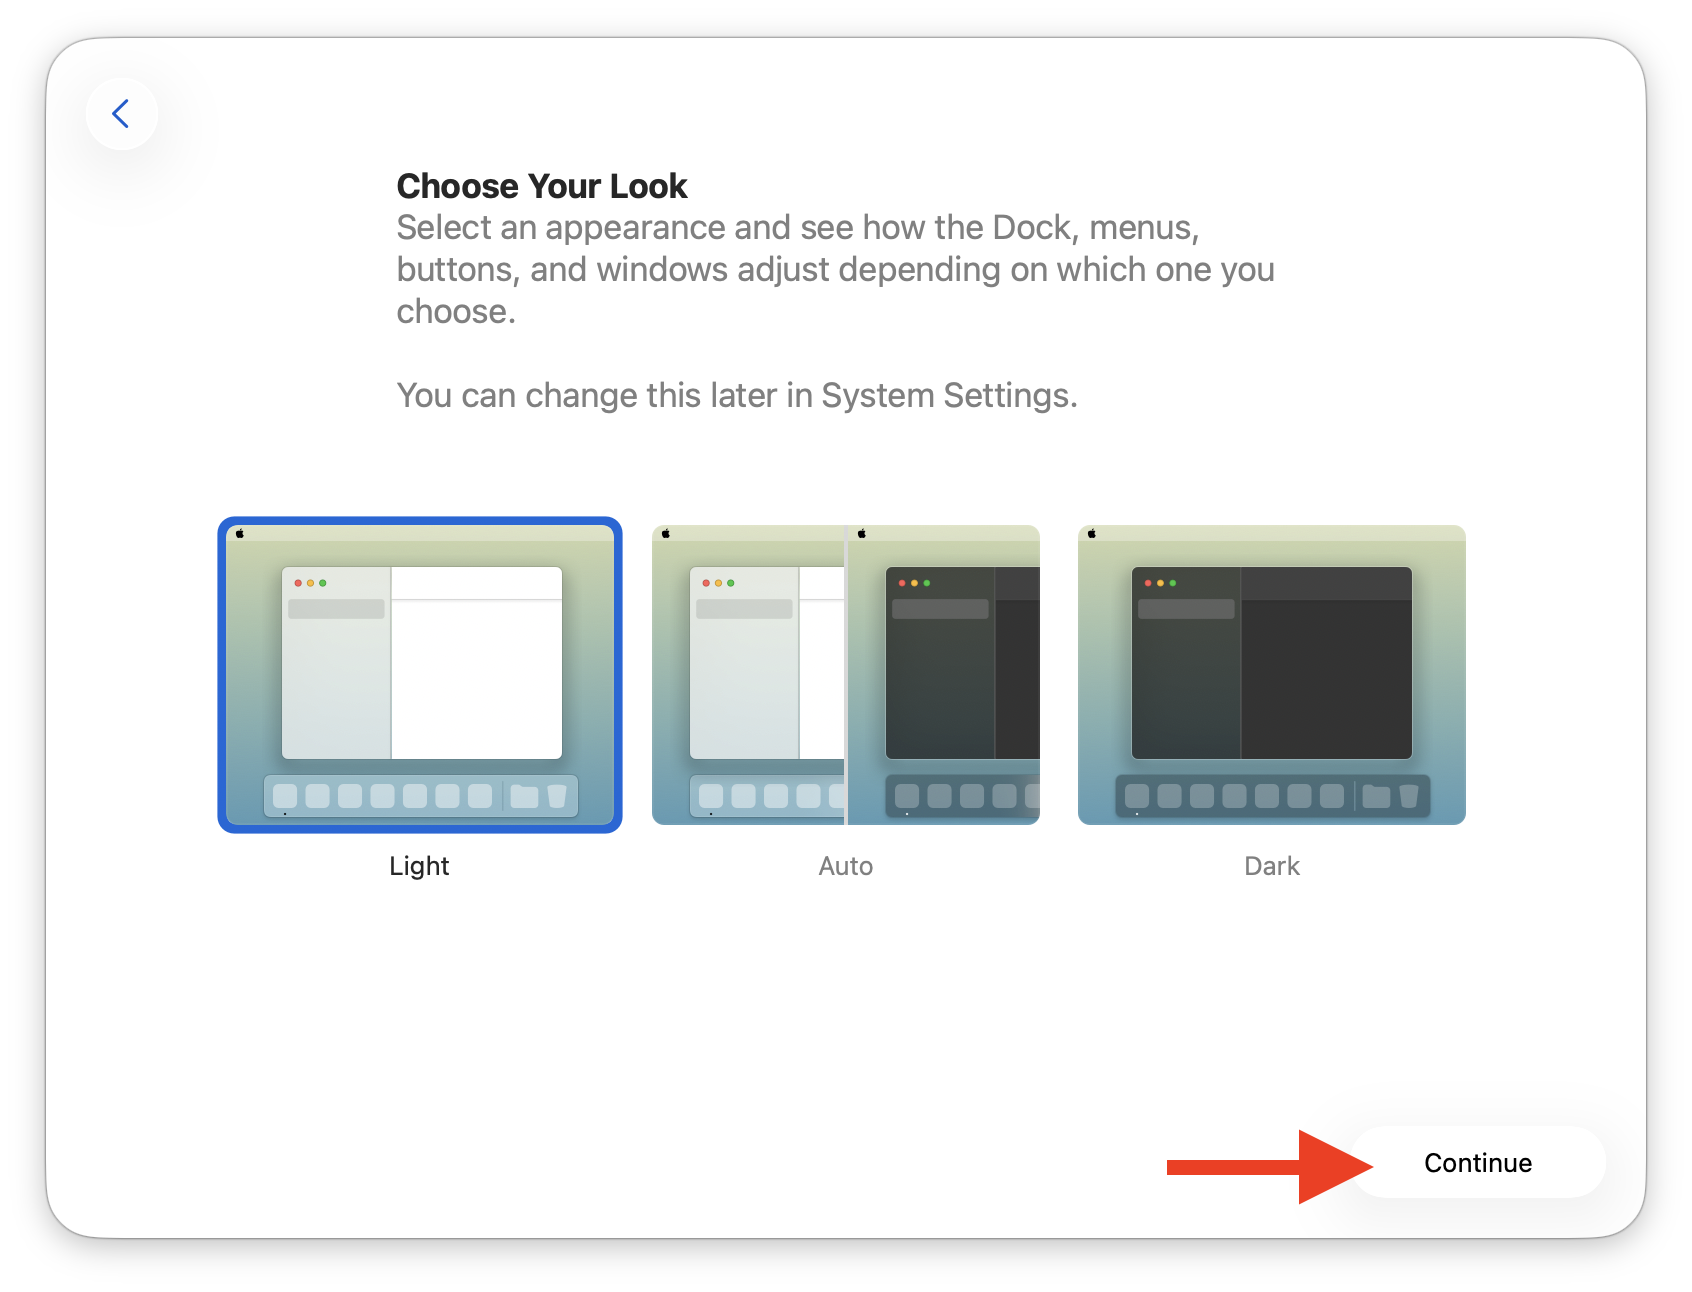 10 10 |
2. Grant Local Network Access:
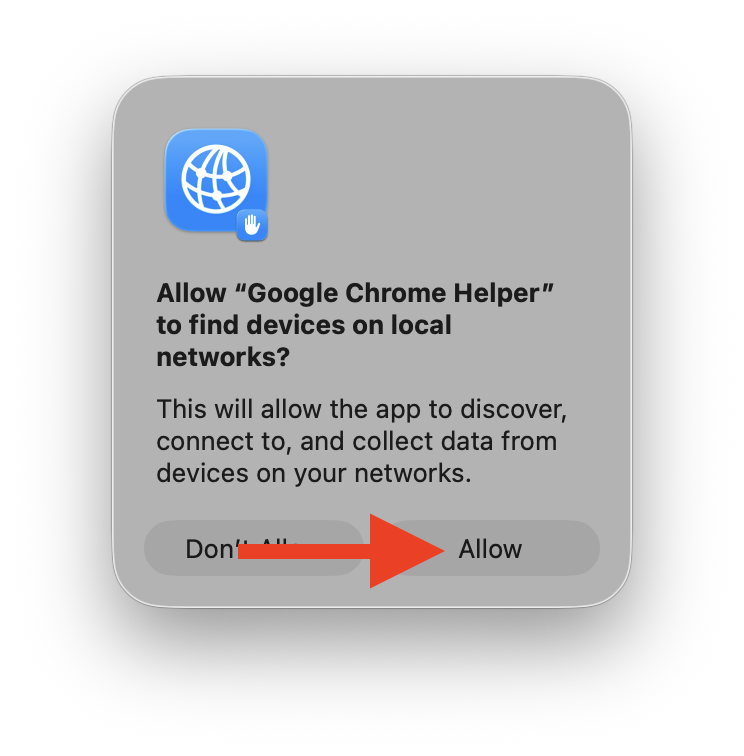
After the first login following the update, the following dialog may appear when opening an app. To ensure the app functions correctly, you must grant permission to access the Local Network. For any app that might requests this permission, click Allow.
Other apps that are affected:
 | 3CX (PWA) |
 | Firefox |
 | Google Chrome |
 | HIN Client |
 | ScanSnap Home |
 | Windows App |
For all of the applications mentioned above, a dialog box will automatically appear. Click Allow for each one.
Was this article helpful?
That’s Great!
Thank you for your feedback
Sorry! We couldn't be helpful
Thank you for your feedback
Feedback sent
We appreciate your effort and will try to fix the article